How to Set Up Your First Home Recording Studio (Step-by-Step)
May 31, 2025
By Zachary Cobb
Dreaming of recording at home but not sure where to start? You’re not alone. Whether you’re a vocalist, podcaster, or producer, building a home studio is more accessible than ever — and you don’t need a pro engineer's budget to get started. This guide will walk you through the essential steps to create a functional, great-sounding studio at home.
Step 1: Choose the Right Space
Find a quiet, low-echo room (avoid untreated basements or kitchens)
Choose a space where you can control lighting, temperature, and noise
Square rooms = bad acoustics (if possible, go for rectangular shapes)
Step 2: Get Your Core Gear
Here’s what you absolutely need:
Item | Why It Matters | Budget Picks |
|---|---|---|
Computer | Your production hub | Any modern laptop with 8GB+ RAM |
Audio Interface | Connect mics/instruments to computer | Focusrite Scarlett 3rd Gen / Behringer UMC22 |
Microphone | For vocals or instruments | |
Headphones | Accurate monitoring | |
MIDI Controller (Optional) | If you produce music |
Tip: Stick to budget-tier gear with great reviews — you can always upgrade later.
Step 3: Pick Your DAW (Digital Audio Workstation)
Free: Cakewalk, GarageBand (Mac), or Tracktion
Paid (budget): Reaper, FL Studio Fruity Edition
Choose one and commit — don’t DAW-hop early on
Step 4: Treat the Room (Even a Little Helps)
Place acoustic foam or bass traps behind monitors and at first reflection points
Use rugs, curtains, and bookshelves to absorb/reduce echo
DIY idea: moving blankets or thick quilts can work in a pinch
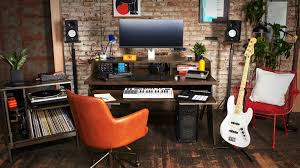
Step 5: Set Up Your Studio Layout
Place speakers at ear level, forming an equilateral triangle with your head
Keep your mic away from noisy sources (laptop fan, window, etc.)
Invest in a mic stand with a shock mount + pop filter for better recordings
Step 6: Test & Tweak
Do a test vocal or guitar recording and play it back
Tweak mic placement, gain levels, and speaker position
Make small acoustic adjustments until it sounds clean
Conclusion
You don’t need to spend thousands or hire a professional to get started with home recording. With just a few pieces of gear and a smart setup, you’ll be well on your way to making professional-quality audio right from your bedroom or office.
👉 Need help picking gear? Browse our Gear Catalog for budget-friendly, high-quality options to launch your home studio today.